Git Guide
Getting Started
What is Git?
Git is a distributed version control system used for tracking changes in source code and other files during software development. It was created by Linus Torvalds in 2005 for managing the development of the Linux kernel. Git allows developers to work on a codebase simultaneously and independently, without overwriting each other's changes.
Git is designed to be fast, efficient, and secure. It keeps a complete history of changes made to a project, allowing developers to revert to previous versions if necessary. Git uses a branching model, which enables developers to work on different features or bug fixes in parallel and merge changes back into the main codebase.
Git has become the industry standard for version control and is widely used in software development. It also has a large and active open-source community, which provides a wealth of resources and tools for developers.
Git stores code in repositories (or "repos" [pronounced ree-poe]); you can "check out" a repository to get the latest version of the code.
It's important to remember that when we're talking about Git repositories, we're typically talking about two versions of the repository: one that's running on a server (aka the "remote" or "origin"), such as GitHub, and one that's running on your computer (aka the "local", which is "cloned" from the remote). When you commit changes to your local repo, those changes are not available to anyone else in your group until you "push" the changes to the remote.
Access Tokens
In order to access iSchool repos on GitHub Education, you’ll need to create a personal access token, which will be used like a password. Follow the steps in the GitHub documentation to create your personal access token. Make sure you save your access token someplace where you'll be able to find it again; once you leave the GitHub page where the token was created, you won't be able to see it there again.
Note that when you're prompted for a password, like when calling git push, you actually need to enter your access token.
Installing Git
If you don’t already have Git on your computer, you’ll need to install it.
Gitflow
This suggested workflow is based on the GitHub flow.
If you're working on a larger project, especially one with multiple versions in production simultaneously, check out the branching model from Vincent Driessen.
Create and check out the branch
In the GitHub issue, click "Create a branch":

This will automatically name the branch with the issue's ID and name:

Then check out the branch in your local repository (where <feature-branch> is the name of the branch, e.g., "4-create-upload-page"). You'll have to fetch first so that the local repo knows that the branch exists.
git fetch
git checkout <feature-branch>
Alternatively, you can create the branch locally, but you should still use the same naming convention. Retrieve the main branch, make sure it's up-to-date (with git pull), and then create your feature branch from that, where <feature-branch> is the ID and name of the GitHub issue, such as "4-create-upload-page".
git checkout main
git pull
git checkout -b <feature-branch>
When you create a branch through the GitHub issue, it'll automatically be linked with the issue. If you create the branch locally, you'll have to link the branch manually in the GitHub issue:

When resuming work on a feature, retrieve your branch:
git checkout <feature-branch>
Write Code
Do work.
Save changes to your branch:
git add .    # only needed if you've added or deleted files

git commit -a -m "<message>"
git push
Periodically merge develop into your feature branch. The following is key: it will get whatever was added to develop since you did your last fetch from origin and try to apply your changes in <branch> on top of them, if it can. You need to resolve any conflicts on your branch; that way, we keep develop clean and safe for everyone.
From time to time, repeat these so your branch doesn't get behind. And be sure to always do this before creating a pull request.
git fetch
git merge origin/main
When ready to push to GitHub and create a pull request, do a last review of all of your changes with git diff. Make sure you didn’t forget any experimental or debugging code, such as log statements. Then commit one last time:
git diff

git commit -a -m "<message>"
git push
Push and Review Code
Log into GitHub and create the pull request (PR) to merge the feature branch into main, by clicking the "New pull request" button on the "Branches" page:
![]()
Creating the PR (rather than directly merging the feature branch into main) is important! Doing so:
- provides the visual diff in GitHub of the lines changed, so the work can be reviewed, commented upon, and approved by your group
- allows for a history of merged PRs in GitHub, so all of the work merged for the PR can be seen in one place; without that, the only option is for commit-by-commit diffs
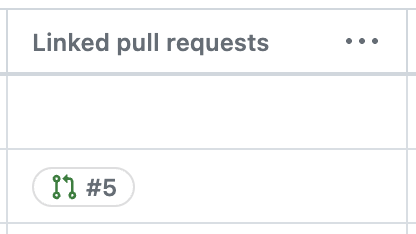
- shows the PR(s) in the GitHub project page, so it’s clear what target branches that code has ended up on:

Git Commands Reference
git clone
Download a copy of a repository into a new directory.
git checkout [-b]
Switch to a different branch; specify the -b flag to create a new branch.
git add .
Place new files under version control.
git status
Show the current state of the working tree (i.e., the files that you’re working on).
Use the -s flag for a shortened view.
git commit [-am]
Record changes that you’ve made to the repository.
Use the -a flag to automatically include files that you’ve modified or deleted; you’ll still need to use “git add .” to include any new files that you’ve created.
Use the -m flag to include a commit message; best practice is to preface your commit message with the ticket ID for whatever task you’re working on.
git push
Update the remote repository (i.e., GitHub Classroom) with the changes that you’ve committed to your local repository.
git merge
Join two branches together.
git log
See a history of commits for your current branch.
Use “git log --graph --decorate --oneline” for a concise view.
git branch [-D]
See the name of the branch that you’re currently on.
Use the -D flag to delete the branch.
git pull
Retrieve the latest commits on a branch from a remote repository.
git fetch
Get the list of available branches from a remote repository; often needed before “git pull”
gitconfig
gitconfig lets you customize your Git behaves in your repositories. There are a couple different places where it can live:
- a file named
.gitconfig(note the leading dot in the name) in your home directory- e.g., in
C:\Users\<username>\on Windows or~(/Users/<username>/) on macOS/Linux - this file is global and will affect all repos on your system
- e.g., in
- a file named
configin the hidden .git directory in your project directory- this file is local and only affects the repo that contains it
- settings in this file override the settings in the global .gitconfig
Include the following in your gitconfig:
[user]
   name = First Last
   email = username@rit.edu
[gui]
[alias]
  st = status -s
  ci = commit
  co = checkout
  df = diff
  lol = log --graph --decorate --oneline
  clr = "!f() { git reset --hard && git clean -f -d; }; f"
[diff]
  tool = vimdiff
[push]
    default = current
[color]
   branch = auto
   diff = auto
   status = auto
[credential]
   helper = cache --timeout=604800
This gitconfig provides a few benefits:
- it sets a bunch of aliases, so, for example, you can just type git co instead of git checkout
- when pushing a branch to the remote repo, it'll default to the current branch name (which is almost always what you want) so you don't have to specify a remote name
- it'll cache your password/token for 604,800 seconds (1 week)
Prompt Customization
You can (and should!) use a tool like fancy-git to include the Git branch name and status in your terminal prompt.
![]()
A simpler version is git-prompt with git-completion (both from the actual Git project).
![]()
Commit Message Best Practices
Short example:
PROJ-123 Refactor function foobar() to reduce complexity
Longer example:
PROJ-123 Refactor function foobar() to reduce complexity

* Remove nested loops
* Add meaningful variable names
* Convert nested tertiary operators to 'if' statements
These are the general rules to keep in mind when writing a commit message:
- Start each commit message with a ticket number, such as from Jira or Azure DevOps
- This is really important! Branches disappear, but commit messages remain forever
- Including the ticket number makes it a lot easier to figure out which task corresponds to that commit
- In the example: "PROJ-123" would correspond to a ticket in Jira or Azure DevOps
- Include a pithy subject line for each commit; add a longer body for larger commits
- In the longer example: the subject line (the first line) is kept short, and then more details are added in the body
- Use bullets (asterisks) for the body, when necessary, to clearly indicate all the work done in the commit
- In the longer example: three bullets are used to itemize the work that was actually done to refactor the function
- Separate subject from body with a blank line
- In the longer example: see how there's nothing on the second line?
- Limit the subject line to 80 characters and wrap the body at 80 characters
- In the example: even with the ticket number, the total length of the subject line is 56 characters
- Capitalize the subject line
- In the example: the first letter is capitalized in "Refactor", "Remove", "Add", and "Convert"
- Do not end the subject line with a period
- In the example: witness no periods. If the lines in the body grow longer, then it's find to separate sentences with periods or other punctuation
- Use the imperative mood in the subject line; i.e., write it as a present-tense command.
- In the example: it's "Refactor function", not "Refactored function" or "Refactors function"
- When you're reading through commits and determining what will happen if you merge the commit into your branch, you should be able to prepend each commit message with, "If I merge this commit, it'll <commit message>". E.g., "If I merge this commit, it'll refactor function foobar() to reduce complexity"
- Use the body to explain what and why, not how
- E.g., don't say: "Call filter_var( $input, FILTER_SANITIZE_EMAIL )" Do say: "Sanitize email input to prevent CSS"
Most of these rules are taken from Chris Beams. See his blog post for a more thorough explanation of these rules.
Git Stash
When you have code that you have modified and you need to switch between branches, but you don't yet want to commit your changes, you can utilize Git's built-in command called 'stash':
Check out Pro Git: Stashing and Cleaning, which is where this info came from.
You can check what the current status is of your git repo vs. your local files by calling:
git status

On branch main
Changes to be committed:
  (use "git reset HEAD <file>..." to unstage)

    modified:   README.md
    modified:   src/pages/registration.js

Changes not staged for commit:
  (use "git add <file>..." to update what will be committed)
  (use "git checkout -- <file>..." to discard changes in working directory)

    modified:   src/pages/login.js
Then once you have established that there are changes you want to keep track of, stash them:
git stash
When you call git status, you can see that your repo has been reverted and your changes are safely stored away:
git status

# On branch main
nothing to commit, working directory clean
You can have multiple stashes, so make sure you check to see where in the list of stashes this is located:
git stash list
stash@{0}: WIP on 2-create-registration: 47a498d #2 Add desc to readme
stash@{1}: WIP on 4-create-upload-page: c264051 #4 Add upload handling
stash@{2}: WIP on 4-create-upload-page: 21d80a5 #4 Create upload page
When you want to get your stash out of hiding, you use the pop command:
git stash pop
And you can specify which stash to retrieve by supplying a stash index:
git stash pop stash@{2}
